After getting feedback yesterday on how to bring my model into Substance Painter properly, I started to work on getting my Skollcrabb model finished.
The main feedback I got was on how the seams worked on my model's UVs. Before when I brought it into Substance Painter, all the seams were auto-generated. That meant there were a LOT of faces created from the seams, and drawing on one of them copied it to every face.
So I took each object and worked on each UV again from scratch. I made sure to create enough seams so that when I added a texture onto the shapes, the images wouldn't be stretched out. It was a quick enough process, and finding out about the Layout function made rearranging the UV shells a lot quicker and easier than I thought.
I then applied different lamberts to each object that would have a certain texture on it; the skull & jaw would have one, the head, arms, claws & legs have one, and the eyes have one. That way, when I bring it into Substance Painter, each group of objects under one lambert would be grouped together.
And that's exactly what happened! I had three layers set up at the start, which I nicknamed "BO0O0O0O0ONE!!!", "eyes" and "shell". I tested dragging textures onto different areas of the Skollcrabb, and sure enough, only certain areas got affected; the ones grouped together!
From there, it was a process of finding the right look. I messed about with two main textures for the skull & jaw; a preset for bone that looked like bone but didn't give off the exact effect I wanted, and a matte porcelain preset with a cracked texture. I ended up going with the porcelain one, since the cracks looked a lot closer to what I wanted. I was also able to change the base colours, so it'd look more like off-white, signifying the age of the shell.
The actual shell body underneath the skull was textured using a rust preset. It gave off a battered, layered look, which looked really nice when I changed the base colour to a dark purple.
Finally, the eyes. These were by far the easiest to texture; white gloss with drawn on pupils. While I was drawing on the model, I also added 2D looking eye holes, nose hole and teeth.
And in the end, the Skollcrabb model looks like this:
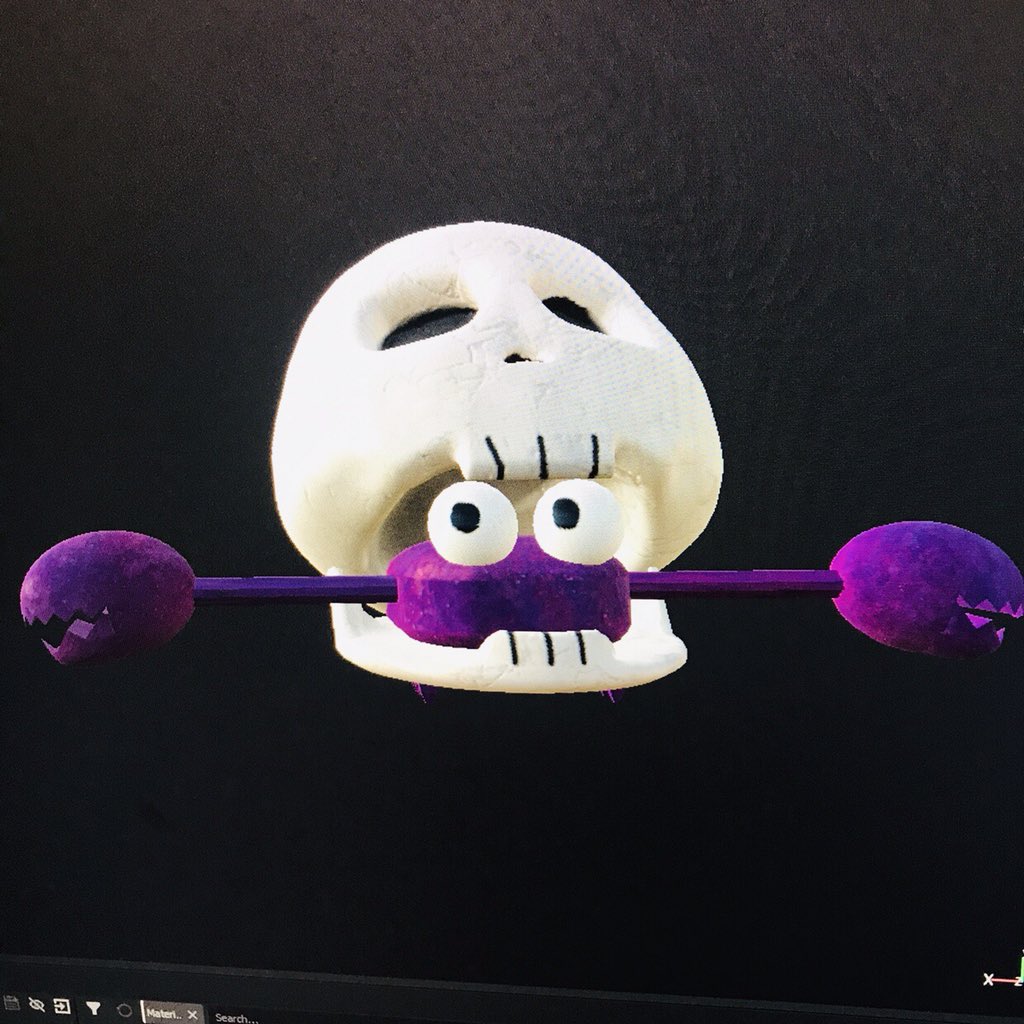
I'm REALLY happy with how it turned out! This is exactly what I envisioned Skollcrabb looking like in 3D with textures, and it's the first time I've taken one of my characters and made it 3D, so it's a big deal for me! I'm glad that after so much trial and error, I have a textured Skollcrabb that looks as good as it does! Next step from here is bringing the textures back into Maya and creating a turnaround, as well as some composited images.
No comments:
Post a Comment